
Why Fashion Bloggers in Chicago, IL Recommend Smart Tucking for Loose Shirts
May 16, 2026
Why Los Angeles, CA Fashion Enthusiasts Are Choosing Relaxed Japanese Streetwear at Home
May 25, 2026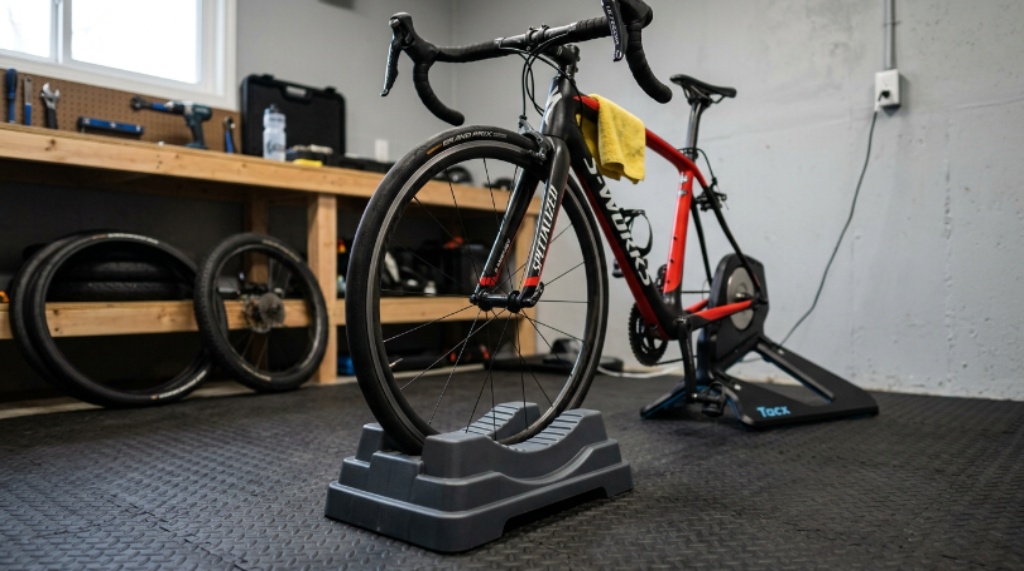
Why a Front Wheel Riser Block Matters More Than You Think
Many cyclists spend a lot of money on a quality trainer. However, they often forget one small but important accessory — the front wheel riser block. Without it, your bike tilts downward at the front. This unnatural angle puts extra pressure on your wrists, arms, and lower back.
A riser block simply lifts the front wheel to match the height of the rear wheel on the trainer. It levels your bike. Therefore, your riding position becomes much more natural and comfortable. Even short training sessions feel better when your body is properly aligned.
This guide will help you find the right riser block. We will cover materials, height options, stability, compatibility, and price. By the end, you will know exactly what to look for.
Understanding the Basics of Bike Positioning on a Trainer
When you place your bike on a turbo trainer, the rear wheel or the dropout sits elevated on the trainer unit. This elevation is usually between 2 and 4 inches, depending on the trainer model. The front wheel, meanwhile, rests flat on the floor. This creates an uneven slope.
Riding in this position for 30 minutes or more can cause discomfort. Additionally, it can lead to poor pedaling efficiency. Your hips tilt forward, your weight shifts to your hands, and your core works harder than it should.
A riser block corrects this imbalance. It acts as a small platform that supports the front wheel at the correct height. As a result, your bike sits level and your body can maintain a natural riding posture throughout your session.
Key Factors to Consider When Choosing a Riser Block
Height Compatibility with Your Trainer
Not all trainers raise the rear wheel by the same amount. Therefore, the first step is to check how high your trainer elevates the bike. Most riser blocks are designed for a standard height of around 2 to 3 inches. However, some trainers lift the rear wheel higher. In that case, you may need a taller or adjustable block.
Measure the height difference between your rear axle and the floor before buying. This simple step saves you from purchasing the wrong product.
Adjustable vs. Fixed Height Blocks
Fixed-height riser blocks are simple and affordable. They do one job and do it well. However, they only work if your trainer matches the block’s specific height.
Adjustable riser blocks offer more flexibility. They usually come with removable layers or wedge sections. You can add or remove sections to find the perfect height. This is especially useful if you switch between different trainers or share equipment with another rider.
Material and Build Quality
Riser blocks are commonly made from foam, hard plastic, or rubber. Each material has its advantages.
Foam blocks are lightweight and soft. They grip the floor easily and reduce vibration slightly. However, they can compress over time and may wear down with heavy use.
Hard plastic blocks are durable and hold their shape for years. They are easy to clean and often more stable than foam. Some plastic blocks include rubber grip pads on the bottom to prevent sliding.
Rubber blocks offer excellent grip and shock absorption. They tend to be heavier but very long-lasting. If your floor surface is slippery or you ride at high intensity, a rubber block might be your best choice.
Surface Grip and Stability
A riser block must stay in place during your entire ride. A block that slides or shifts can disrupt your focus and even cause a fall. Therefore, always look for a block with a non-slip base.
Additionally, consider the surface of your training area. Smooth tiles or hardwood floors require a block with strong grip. Some cyclists place a training mat underneath both the trainer and the riser block. This setup provides extra stability and protects the floor.
Compatibility with Your Tire Size
Most riser blocks are designed to accommodate a range of tire widths. However, it is worth checking this before you buy. Road bike tires (700c) are narrow and usually fit any standard block. Mountain bike tires are much wider. If you train on a mountain bike, look for a block with a wider channel or cradle.
Some newer riser blocks are also designed to work without a tire. These flat-top models support the fork directly. They are useful for bikes with direct-mount trainers or bikes fitted with a trainer-specific rear skewer.
Types of Front Wheel Riser Blocks Available
Single-Piece Fixed Blocks
These are the most basic and affordable option. They are usually made from hard foam or molded plastic. They work perfectly for riders who always use the same trainer. They are easy to store and lightweight enough to pack in a gym bag.
Stackable Layer Blocks
These blocks come with removable sections, typically in sets of two or three layers. You can adjust the height in small increments. This design is very popular among serious indoor cyclists who want a precise fit.
Rocking or Motion Blocks
A newer category of riser blocks allows slight side-to-side movement. This mimics the natural sway of outdoor riding. Consequently, it engages your core and reduces hip stiffness during long sessions. These blocks cost a bit more. However, many cyclists find them worth the investment for comfort during longer rides.
Folding or Collapsible Blocks
If space is a concern, folding riser blocks are an excellent choice. They flatten out for easy storage under a bed or in a small bag. They are usually made from rigid plastic with hinged joints. Despite being compact, they are just as stable as fixed models.
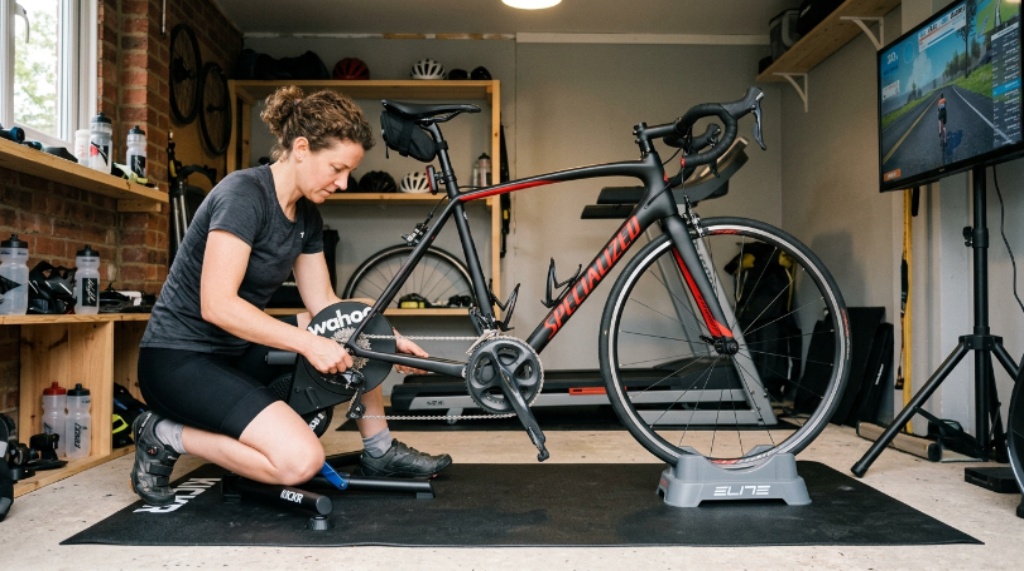
How to Set Up Your Riser Block Correctly
Setting up is straightforward. First, place your trainer on a flat surface. Then position the riser block directly in front of it, in line with your front wheel. Roll the bike forward until the front tire sits centered in the block’s cradle.
Next, check that the bike looks level from the side. A quick visual check usually tells you if the height is right. If the front still sits lower than the rear, add another layer or switch to a taller block.
Additionally, make sure the block does not move when you apply pressure. Sit on the bike and push down firmly on the handlebars. If the block shifts, reposition it or use a mat underneath for better grip.
Price Range and What to Expect
Riser blocks range from around $10 to $50 or more. Budget options are perfectly functional for casual riders. They offer reliable height correction without any extra features.
Mid-range blocks, typically priced between $20 and $35, usually offer adjustable height and better build quality. They are suitable for riders who train three to five times per week.
Premium rocking blocks and motion platforms cost $40 and above. These are designed for serious athletes who spend hours on their trainers each week. They add a dynamic element to the indoor cycling accessories category that goes beyond simple height correction.
However, spending more does not always mean better results. A simple fixed block at $15 can serve a beginner rider just as well as an expensive adjustable model.
Conclusion
Choosing the right front wheel riser block is a small decision with a big impact. It improves your riding posture, reduces discomfort, and makes every trainer session more effective. Start by measuring your trainer’s rear wheel height. Then decide between fixed, adjustable, or rocking styles based on how often and how hard you ride.
Consider the material, grip, and tire compatibility before making a final choice. Whether you are building your first trainer setup or upgrading an existing one, the right riser block is a worthwhile investment. It is one of the simplest indoor cycling accessories you will ever buy — and one of the most useful.
Frequently Asked Questions
Do I really need a front wheel riser block for indoor training?
Yes. Without a riser block, your bike tilts forward on the trainer, which strains your wrists, neck, and lower back. A riser block levels the bike and improves your comfort significantly.
What height riser block do I need for my trainer?
It depends on your specific trainer model. Most trainers elevate the rear wheel by 2 to 3 inches. Measure the height difference between your rear axle and the floor, then match it with the appropriate block height.
Can I use a book or a piece of wood instead of a riser block?
You can use a DIY alternative in a pinch. However, purpose-built riser blocks offer better grip, the right height increments, and a stable cradle for your tire. They are also safer and more consistent.
Are rocking riser blocks better than fixed ones?
Rocking blocks add a natural side-to-side motion that engages your core and feels more like outdoor riding. They are great for long sessions. However, fixed blocks are more affordable and perfectly effective for most riders.
Will a riser block work with both road and mountain bike tires?
Most riser blocks fit standard road bike tires easily. If you use a mountain bike with wider tires, look for a block with a wider cradle or a flat-top design that accommodates different tire widths.

