How much electricity do solar panels produce?
September 22, 2024
Alabama Roof Coating: The Ultimate Shield for Your Home
September 23, 2024Ever looked up at a beautifully sloped roof and wondered how it all stays together? Or maybe you’re planning a DIY project and need to understand the basics of roof design. Whatever your reason, you’re in the right place. Welcome to your ultimate guide to rafter roof design! We’ll break down everything you need to know, from the types of rafters to the nitty-gritty of construction. Ready to dive in? Let’s get started!
Table of Contents
ToggleWhat is a Rafter Roof?
A rafter roof is a traditional roofing system where inclined beams, known as rafters, support the roof covering. These rafters run from the ridge (the highest point of the roof) down to the eaves (the edges of the roof). Think of them as the skeleton of your roof, providing the necessary support and shape.
Types of Rafters
Rafters come in various shapes and sizes, each serving a unique purpose. Here are the main types:
- Common Rafters: These are the most basic type, running from the ridge to the wall plate.
- Valley Rafters: Found where two roof planes intersect, these rafters handle more load and are usually thicker.
- Hip Rafters: These run diagonally from the corners of the roof to the ridge, supporting the roof’s hips.
- Jack Rafters: Shorter than common rafters, these terminate at the hip or valley rafters.
Why Choose a Rafter Roof?
Rafter roofs offer several advantages over other roofing systems. They provide more flexibility in design, allowing for unique architectural features like vaulted ceilings and overhangs. Plus, they can be constructed using various materials, from traditional wood to modern steel.
Flexibility in Design
One of the biggest perks of rafter roofs is their versatility. Want a cozy attic space? No problem. Dreaming of a dramatic cathedral ceiling? You got it. Rafters make it all possible.
Material Choices
While wood is the most common material for rafters, you can also use steel or cold-formed steel. Each material has its pros and cons, so choose based on your specific needs and budget.
Designing a Rafter Roof
Designing a rafter roof involves several steps, from calculating loads to selecting materials. Let’s break it down.
Calculating Loads
First things first, you need to know what loads your roof will need to support. This includes the weight of the roofing material, any snow or ice, and even wind loads. Accurate calculations are crucial for a safe and sturdy roof.
Selecting Materials
Next, choose your materials. Wood is traditional and offers a warm, natural look. Steel, on the other hand, is incredibly strong and durable. Your choice will depend on your design goals and budget.
Structural Design
Once you’ve got your loads and materials figured out, it’s time to design the structure. This involves determining the size and spacing of your rafters, as well as any additional supports like beams or trusses.
Building a Rafter Roof
Now comes the fun part—building your rafter roof! Here’s a step-by-step guide to get you started.
Step 1: Measure and Cut
Start by measuring and cutting your rafters to the correct length. Precision is key here, so take your time.
Step 2: Assemble the Frame
Next, assemble the frame by attaching the rafters to the ridge board and wall plate. Make sure everything is level and secure.
Step 3: Add Supports
Depending on your design, you may need to add additional supports like beams or trusses. These will help distribute the load and add stability.
Step 4: Install the Roof Covering
Finally, install your roof covering. This could be anything from traditional shingles to modern metal panels. Make sure to follow the manufacturer’s instructions for the best results.
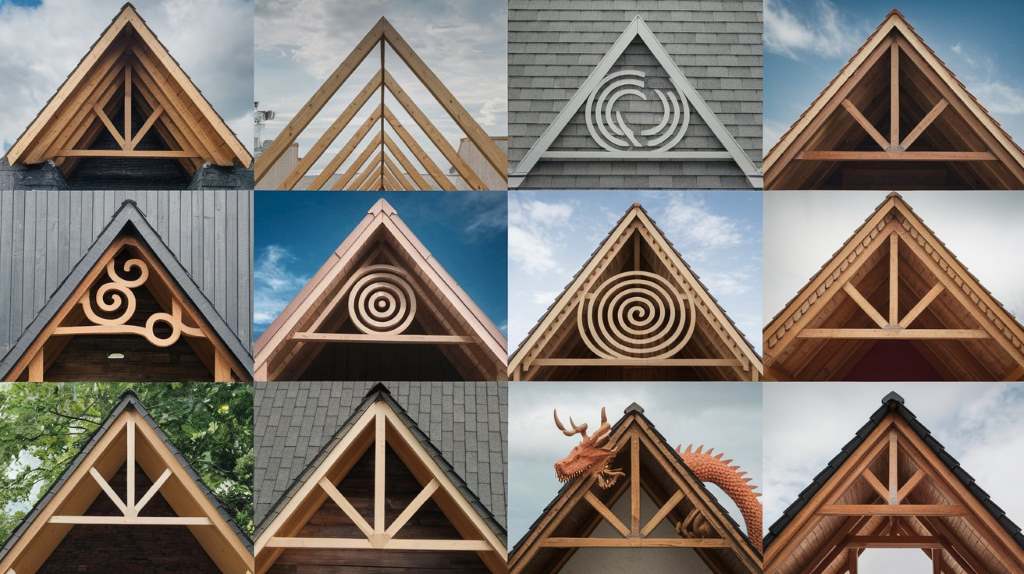
12 Rafter Roof Design Ideas
Maintenance Tips
A well-designed rafter roof can last for decades, but it does require some maintenance. Here are a few tips to keep your roof in top shape:
- Regular Inspections: Check your roof at least twice a year for any signs of damage or wear.
- Clean Gutters: Keep your gutters clean to prevent water damage.
- Repair Promptly: Address any issues as soon as they arise to prevent further damage.
Conclusion
Designing and building a rafter roof might seem daunting, but with the right knowledge and tools, it’s entirely doable. Whether you’re tackling a DIY rafter roof design project or planning a new build, understanding the basics of rafter roof design will set you up for success. So go ahead, roll up your sleeves, and get to work. Your dream roof is just a few steps away!


