
How to Wear a 90s Style Jacket: Your Ultimate Guide
October 24, 2024Benefits of Car Hire Excess Insurance
October 28, 2024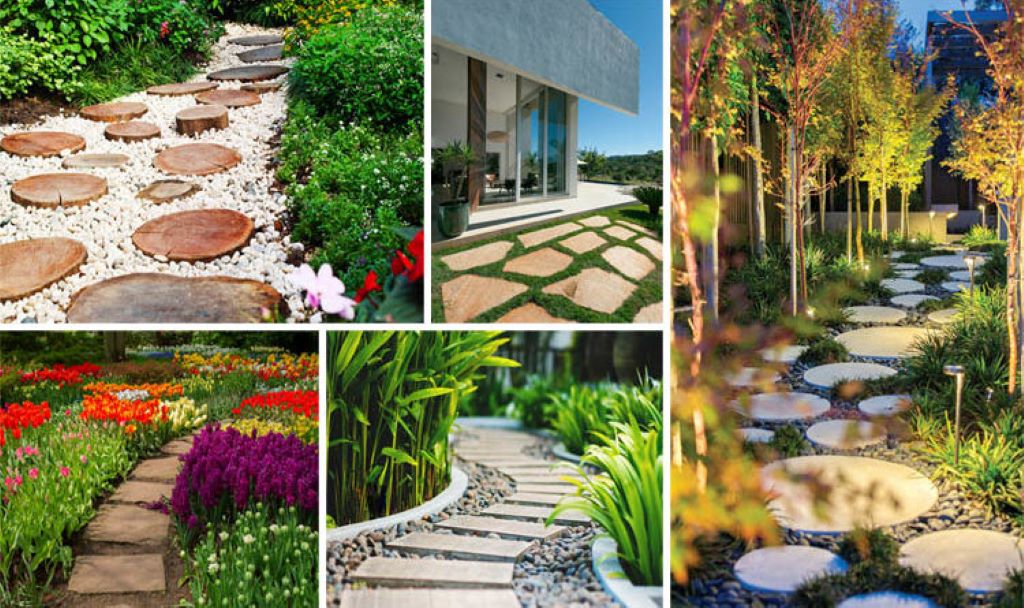
Creating garden stepping stones can be an enjoyable, hands-on way to add character and function to your yard. Not only do these stones provide a convenient path, but they also act as decorative elements that enhance your garden’s design. Whether you’re new to garden DIYs or already love craft projects, making your stepping stones is an accessible project that invites creativity.
Let’s dig in to see exactly how to make garden stepping stones, from choosing the materials and designing them to laying them out in a way that maximizes both style and practicality.
Why Create Garden Stepping Stones?
Crafting garden stepping stones is an activity that brings together both art and function. In the United States, 64% of homeowners engage in gardening, and adding a personalized touch to paths is growing in popularity as more people aim to make their gardens uniquely their own. Here are just a few benefits of DIY garden stepping stones:
- Personalized Design: You can create shapes, add textures, or even incorporate family handprints or pet pawprints. These stones can tell a story while beautifying the space.
- Cost Efficiency: The DIY process is budget-friendly; with minimal materials, you can save up to 50% of the cost of purchasing pre-made stones.
- Environmental Friendliness: Making stepping stones from eco-friendly materials or upcycling items, like old glass pieces, can reduce waste.
-
What You Need to Make Garden Stepping Stones
Creating your stepping stones doesn’t require many materials, and you can often find them at local hardware or craft stores.
Basic Supplies
- Concrete or Cement Mix: Quick-setting concrete is ideal for stepping stones because it’s durable and weather-resistant.
- Molds: Plastic molds work great, or you can upcycle items like old pie pans, lids, or trays.
- Water: Essential for mixing with cement or concrete.
- Mixing Container and Stirring Stick: A plastic bucket and a wooden stirrer work perfectly for this.
- Decorative Elements: Stones, marbles, seashells, broken tiles, or even glow-in-the-dark paint are great for decoration.
(Optional Materials)
- Gloves and Masks: Cement dust can be irritating, so using gloves and a dust mask is a good precaution.
- Sealant: This is optional but helps protect the stones against weathering.
Now that you know what you’ll need, let’s jump into the steps!
-
Step-by-Step Guide to Making Stepping Stones
Creating stepping stones can take a few hours, plus drying time. Follow this guide to make your stepping stones safe and beautiful.
Step 1: Choose Your Mold Shape and Size
For round or square stones, try pie pans or plastic trays. If you’re making these with kids, they might love heart-shaped stones or fun shapes from silicone baking molds. Molds can be anywhere from 8 to 14 inches wide, depending on your preference.
Tip: Before mixing concrete, check your molds are thick enough to hold the weight and flexible enough to remove once dried.
Step 2: Mix the Concrete or Cement
Pour the concrete mix into a bucket, add water, and stir thoroughly. Follow the instructions on the concrete packaging for the correct water-to-mix ratio. The mixture should be thick but pourable.
Explore Greenideasproducts blog for other eco-friendly and creative ways to use concrete around your garden!
Step 3: Pour the Mix Into Molds
Once the mixture is ready, pour it carefully into your molds, filling them about halfway to start. This is a great time to add any decorative elements you might want, like marbles, shells, or colored stones.
Step 4: Decorate Your Stepping Stones
Place decorations gently on the wet concrete. You can add pieces in a random pattern, create specific designs, or press objects into the concrete. Kids might enjoy adding their handprints or writing their initials. This step is a fantastic way to make each stone unique.
Step 5: Let the Stones Dry and Set
Depending on the concrete you use, your stepping stones should be set within 24-48 hours. It’s essential to leave them undisturbed in a cool, dry place while they harden. Covering them lightly with plastic can protect them from debris.
Step 6: Remove the Stones From Molds and Seal Them
Once fully dried, carefully remove each stone from its mold. Apply a clear outdoor sealant to help them withstand weather changes. This step will enhance their durability, especially if you live in areas with frequent rain or snow.
Creative Ideas for Stepping Stones That Stand Out
Now that you have the basics down, consider these unique ideas for making your garden stepping stones more interesting and personal:
- Engraved Stones: Use letter stamps or even cookie cutters to create engraved words or quotes. Inspirational words or messages can make your garden path feel inviting.
- Glow-in-the-Dark Stones: Adding glow-in-the-dark paint or crushed glass gives your stones a magical look at night. Just apply glow-in-the-dark paint after the stones are fully cured.
- Rubber Stones: For a softer option, especially useful if you’re placing stones in a playground area, consider rubber stepping stones. Made from recycled materials, they are both eco-friendly and provide cushioning.
Placement Tips for a Beautiful Garden Path
Once your stones are ready, laying them out thoughtfully will ensure your path looks great and is functional. Here are some tips:
- Spacing: For comfort, place the stones about 6-8 inches apart. Test your layout by walking on it before finalizing placement.
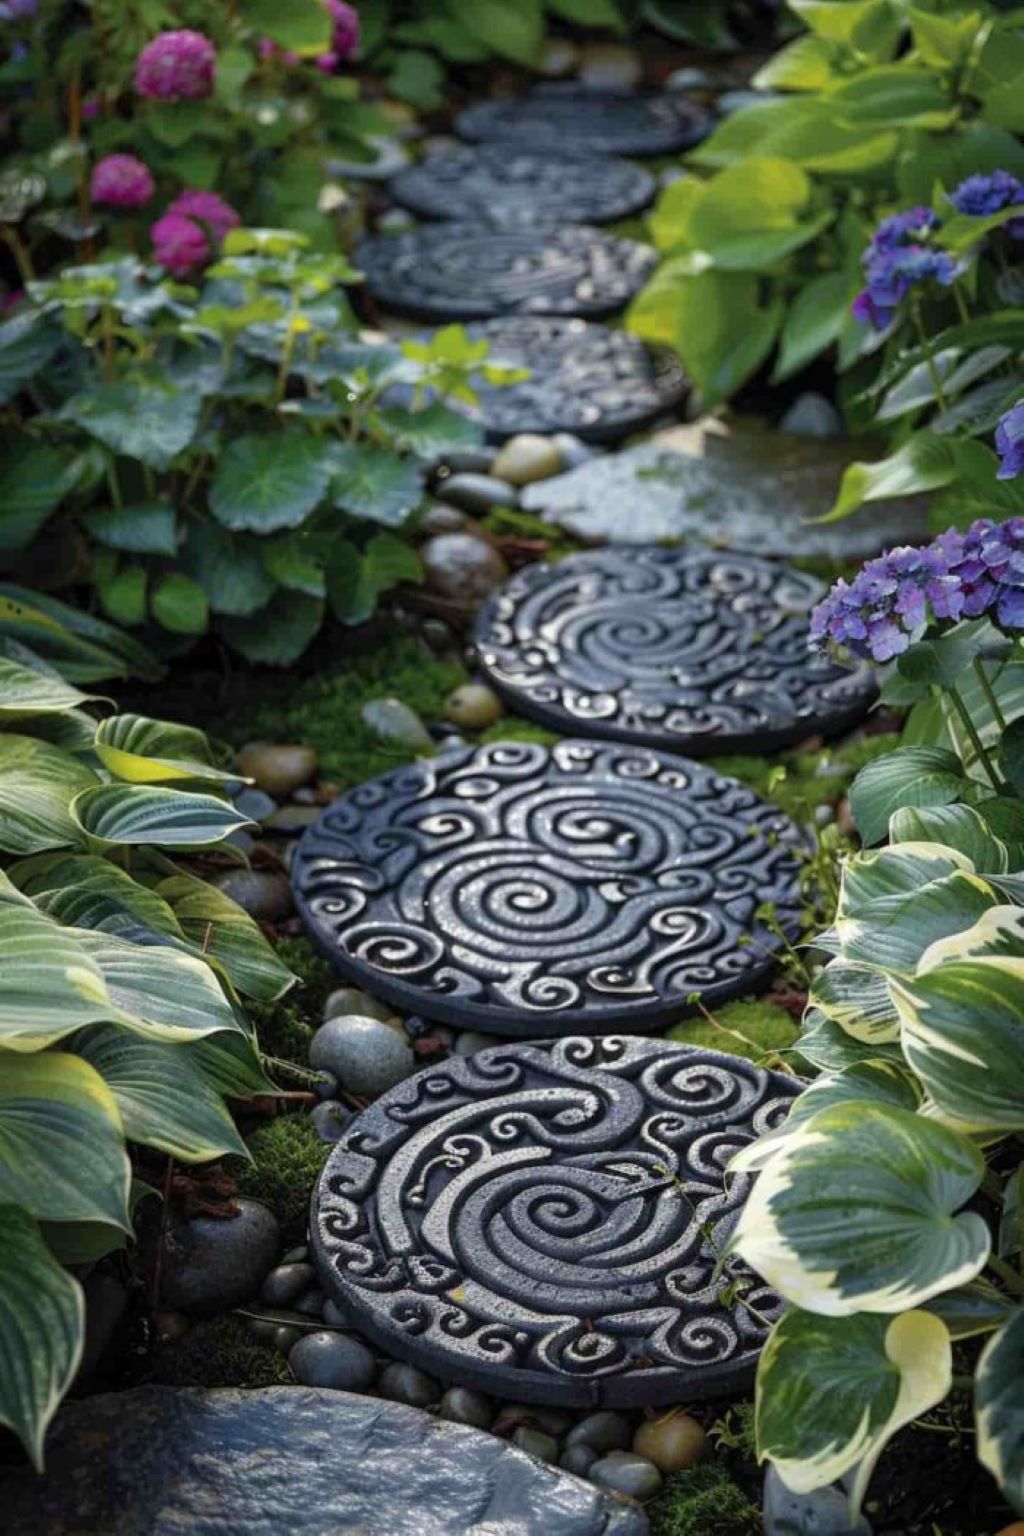
- Pattern: Consider a straight line for formal gardens or a staggered, winding path for a more whimsical look.
- Depth: Dig about an inch into the soil where each stone will sit to keep it stable and prevent movement over time.
Unique Stepping Stone Themes to Try
If you’re looking for more ideas on how to make your stepping stones distinctive, here are some themes that could add a unique twist:
- Nature Theme: Incorporate natural elements like dried leaves, pressed flowers, or even small branches in the stone’s design.
- Family Theme: Handprints or footprint stones can create a lasting family legacy in your garden.
- Seasonal Designs: Consider making one stone for each season, using colors or decorations that represent winter, spring, summer, and fall.
Maintenance Tips for Long-Lasting Stepping Stones
To keep your stones looking fresh year-round, follow these simple maintenance steps:
- Cleaning: Every few months, scrub them gently with water and a soft brush. This will prevent dirt from settling and staining.
- Reapplying Sealant: Every 1-2 years, reapply a clear sealant to protect your stones against rain, sun, and freezing temperatures.
- Replacing Broken Stones: If any stone cracks over time, replace it with a new DIY stone. Cracked stones can be repurposed as decorative edging around flower beds.
What Others Say About DIY Stepping Stones
Opinions on making garden stepping stones vary, but nearly all agree that the process is an enjoyable and rewarding project. Some gardening experts suggest that incorporating recycled materials into the stones, such as broken pottery or glass, can be both eco-friendly and visually appealing.
- Gardenista highlights that homemade stepping stones often cost around half as much as store-bought ones, making them a budget-friendly option.
- Better Homes and Gardens suggests focusing on durability and advises selecting a high-quality concrete mix to ensure the stones last for years.
- Houzz mentions the creative flexibility DIY stones offer, allowing gardeners to design something truly personalized, which isn’t an option with mass-produced stones.
You may find this useful: Kid-Friendly Garden Rakes: Making Yard Work Fun?
Final Thoughts: Crafting Stones for a Personal Garden Touch
Creating your garden stepping stones can be a highly satisfying project. It allows you to blend functionality with personal expression, enhancing your garden with a path that’s truly one-of-a-kind. The customization options are virtually endless—from colors and textures to unique patterns and engravings. Whether you choose to make engraved, rubber, or glow-in-the-dark stones, each stepping stone reflects your creativity and adds personality to your outdoor space.
So, why wait? Gather your materials, pick a sunny day, and start crafting garden stepping stones that are as unique as your garden itself.

