
Spread the Love: Valentine’s Day Fabrics and Crafts
January 5, 2024
Unveiling the Top Contenders: The Most Popular Roof Types in 2024
January 10, 2024
Taking great photos requires more than just a good camera and lighting – you also need a sturdy and versatile stand to mount your camera on. The right stand allows you to get creative with angles, perspectives, and composition. With so many options on the market, choosing the best stand for your needs can be tricky. This comprehensive guide will walk you through everything you need to know to find the perfect stand for photoshoot.
Consider Your Needs
Before shopping for a stand for photoshoot, think about how you plan to use it. Here are some key considerations:
Portability
If you take photos outdoors or want easy transport between locations, look for a lightweight yet sturdy stand. Carbon fiber or aluminum alloy tripods tend to strike the best balance. Larger studio stands and boom arms generally stay put in one spot.
Height
Check the minimum and maximum heights to ensure the stand extends high enough for your needs. Look for adjustable legs and a center column that raises the camera further.
Load Capacity
Make sure the stand can support the total weight of your camera, lens, and any accessories. Studio stands often handle more weight than portable options.
Stability
For long exposures and macro work, stable stands that firmly plant legs and have tension adjusters or weighted hooks minimize vibration.
Footprint
Consider the space you have to work with. Compact tripods are great for cramped indoor conditions, while larger stands occupy more floor space.
Head Type
Pan heads allow you to pan the camera horizontally, while ball heads offer a greater range of motion. Geared heads provide ultra-precise adjustments.
Budget
Decide how much you’re comfortable spending. You can find excellent stands across a wide range of prices.
The Best Stand Types

With your needs in mind, choose from these common stand types for photography.
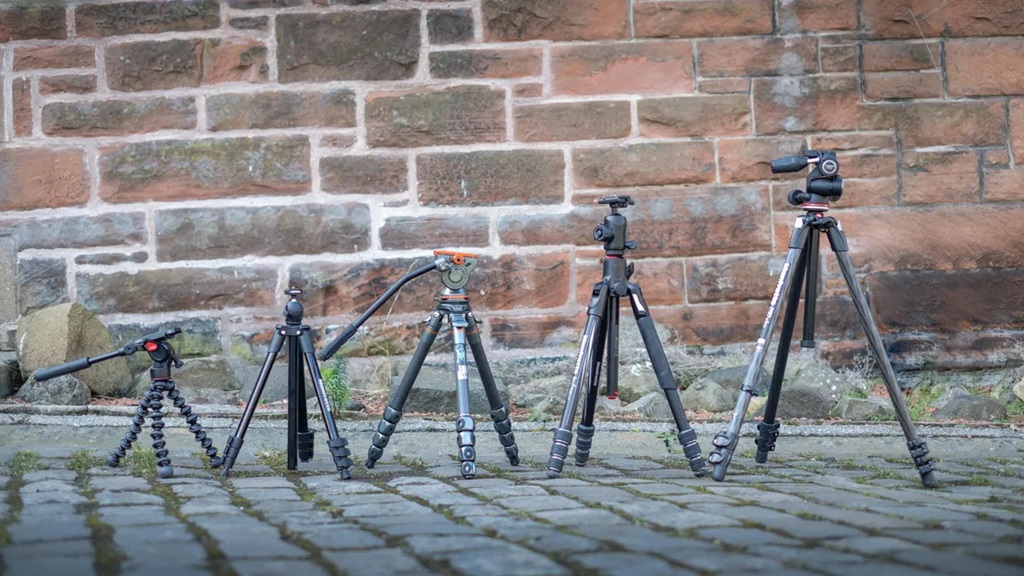
Tripods
Tripods offer a lightweight and versatile option for on-location shoots. They have three legs that adjust to vary height and sturdy rubber feet or spikes for traction. A ball or pan head on top holds the camera. Look for a tripod that strikes the right balance of portability and stability. Brands like Manfrotto and Vanguard are known for quality tripods.
Light Stands
Typically used in studios, light stands have a riser with a light at the top. But many allow you to remove the light and attach a clip for your camera instead. The best photo light stands are air-cushioned or have a boom arm for positioning flexibility.
Monopods
Monopods have a single leg you can quickly set up almost anywhere. Great for action shots, they give you more freedom to move around compared to a tripod. Mono-pods are also useful as an extra support tool when paired with a tripod.
Desktop Tripod Mounts
These miniature tripods sit on a tabletop. They’re extremely portable and well-suited for product photography, food shots, or other compact setups. The tradeoff is less stability and height compared to full-size options.
Ceiling Rigs
Suspending your camera from a ceiling gives a unique top-down view. Some rigs allow you to precisely adjust the camera’s horizontal and vertical position remotely. This requires permanently installing hardware on your ceiling.
Boom Arms
Boom arms have a weighted base on wheels that holds a vertical pole with a horizontal arm on top. This lets you position the camera directly over sets from an aerial perspective. Studio photography stands often include an integrated boom arm.
Crane Stands
For sweeping cinematic shots, the crane stands to have a jib arm that extends out at different angles. Operated manually or remotely, they can move the camera fluidly through space. Cranes require skill to use smoothly and prevent pendulum motions.
Key Features

Beyond the core stand types, look for these helpful extras when evaluating your options:
- Adjustable height: Legs that extend and retract easily make it simple to achieve the perfect height.
- Leveling: Built-in bubbles help you ensure the legs are evenly balanced.
- Pan handle: Handles that pan side to side smoothly are great for tracking moving subjects.
- Tilt motion: Tilt functionality lets you angle the camera up or down.
- Counterweights: Weights on boom stands let you finely adjust balance.
- Wheels: Wheels on the stand’s feet make it easy to reposition the setup as needed.
- Leg braces: Extendable braces between legs improve stability on uneven ground.
- Quick release plate: Plates that quickly attach and detach from the stand save time.
- Carrying case: Padded bags protect your stand during transport and storage.
Choosing the Right Material
Photography stands are built from different materials that impact portability, durability, and price.
Aluminum
Aluminum alloy is lightweight yet strong, preventing camera shake. It’s also moderately priced and resistant to rust. Most portable tripod legs are aluminum.
Carbon Fiber
Even lighter than aluminum, carbon fiber tripods minimize fatigue on long shoots. Carbon fiber dampens vibrations extremely well but comes with a higher price tag.
Wood
Wooden legs and accessories like boom arms have an attractive vintage look. However, wood stands tend to be bulkier and not as stable or durable.
Steel
Steel light stands and studio rigs provide excellent rigidity and load capacity. However, steel is heavy and can rust over time if untreated.
Setting Up Your Stand
Once you’ve got the right stand for your needs, use these tips to get optimal results:
- Plant legs firmly and extend each section evenly to prevent leaning.
- Position the stand where desired, then spread legs for greater stability.
- Use the spirit level to ensure the head is perfectly horizontal.
- Add counterweights on booms and jib arms to prevent tipping.
- Rotate each joint to eliminate any wiggle room before mounting the camera.
- Adjust leg braces on tripods to keep legs from sinking on soft ground.
- Secure quick-release plates tightly to prevent camera drift.
- Check that the stand for photoshoot height lines up with your desired perspective and framing.
Taking a little time to properly set up your stand goes a long way towards getting the best shots possible. Don’t be afraid to make small tweaks to the position between shots to vary the look. Having patience and an eye for good composition will take your photography to the next level.
Helpful Accessories
Some additional gear can make working with stands even easier:
- Remote shutter release: Attaching a remote release allows you to trigger the shutter without touching the camera. This prevents any chance of shake, especially helpful on less stable stands.
- Flash bracket: Mounting a flash off to the side gives you more creative lighting options. A bracket connects easily to the stand.
- Reflectors: Portable reflectors on light stands let you bounce and shape natural lighting on location.
- Sandbags: Weighting down stand legs with sandbags reduces movement in windy conditions outdoors.
- Ball head adapter: Allows you to use your tripod head on a light stand if needed.
- Magic arm: Flexible arms let you mount accessories anywhere on the stand. Great for adding a fill light or external monitor.
- Umbrella: An umbrella attaches to the stand to shade the camera on extremely bright days.
Safety Tips
- Don’t extend tripod legs beyond the marked safety line, which compromises stability.
- Ensure locking screws, clasps, and plates are properly tightened before mounting expensive gear.
- Watch for pinch points when adjusting stand elements and use care when collapsing them.
- Refrain from hanging heavy items like bags from the tripod that throw off balance.
- Don’t exceed the stand’s maximum load capacity or use in very windy conditions.
- Give yourself plenty of space between the stand and yourself or others to prevent accidental bumps.
- Use an extra safety strap like a bungee cord to secure cameras on booms and jib arms.
Get Creative!
A photography stand does more than just hold your camera—it enables creativity. Use these tips to make the most of your stand:
- Alter height for interesting perspectives—shoot from waist-level, eye-level, or high overhead.
- Tilt the camera at an unexpected angle or sideways for a unique composition.
- Move seamlessly during time-lapse by mounting the camera on a slide or dolly.
- Extend a boom overhead for a bird’s eye view of a subject.
- Pan and track subjects in motion for dynamic panning effects.
- Use legs to stabilize flash brackets and reflectors where needed.
Don’t limit yourself—your stand has versatility limited only by your imagination. With the right techniques, you can use it to take your photography to the next level.
Conclusion
Finding the ideal stand for photoshoot takes your photography to the next level by providing stability, expanded perspectives, and creative shot compositions. Consider your needs, preferred features, and budget. Aluminum tripods offer the best bang for the buck for most photographers needing a mobile, versatile solution. Pay attention to height limits, load capacity, and stability when comparing options. Take time to properly set up and position your stand. With quality gear and solid technique, you’ll be able to capture eye-catching photographs using the flexibility of different camera angles and movements.
FAQs
What is the most versatile type of stand for photoshoots?
A high-quality aluminum tripod offers the best versatility for most photographers. Tripods provide good height range, portability, and stability at a moderate price point.
Should I get a heavier stand for stability?
Not necessarily—a sturdier stand with tension adjusters or a weighted hook can often stabilize lightweight materials like carbon fiber. Focus more on stability features than overall mass.
How much should I spend on a photo stand?
Expect to spend $100-$400 for a good tripod, $200-$800 for a studio stand, and $500+ for advanced gear like cranes or ceiling rigs. Avoid the cheapest options, but diminishing returns kick in past a point.
Are phone tripods worth it for mobile photography?
Yes, mini tripods that securely hold smartphones often cost less than $20. They greatly enhance stability and allow you to use the camera’s timer. A mobile tripod is highly recommended for improving phone photo quality.
Can I use a photo stand for shooting video?
Absolutely—video requires stable stands just like photography. Video heads allow you to pan and tilt smoothly. Some tripods like the Manfrotto 502 convert quickly between photo and video use.


